VPC Flow Logs
This guide explains how to enable Amazon VPC Flow Logs, deliver them to Amazon S3, and grant Xshield access to that bucket so you get network traffic visibility. Complete the steps below that match how you onboarded your AWS account (interactive, script-based, or manual).
For Xshield to read and analyze flow log data, the VPC Flow Logs destination (the S3 bucket and the flow log objects) must be unencrypted. Do not enable server-side encryption (SSE-KMS or customer-managed keys) on the bucket you use for flow logs, or Xshield will not be able to read the log objects.
Before you begin
Ensure you have:
- Completed AWS onboarding (resource discovery) so the cross-account role exists
- Administrative access (or equivalent permissions) in your AWS account
- A target VPC where you want to enable flow logs
- An Amazon S3 bucket to receive flow log objects (you can create one during setup)
Step 1: Create or select an S3 bucket for flow logs
- Open Amazon S3 in the AWS Console.
- Create a new bucket (recommended) or select an existing bucket.
- Use an S3 bucket in the same AWS account and region where possible to reduce complexity and costs.
Step 2: Enable VPC Flow Logs and deliver to S3
-
Open VPC in the AWS Console.
-
Select Your VPCs.
-
Select the VPC you want to monitor.
-
Open the Flow logs tab.
-
Click Create flow log.
-
Configure the flow log:
- Filter: choose
All(recommended) orRejectdepending on your requirements. - Destination: select Send to an Amazon S3 bucket.
- S3 bucket ARN: select or paste the ARN of your bucket (for example,
arn:aws:s3:::my-flowlogs-bucket). - Log record format: Select Customise format.
- Log format: In the AWS Console, select all version 2 fields and add
tcp-flagsfrom version 3. - Note: The default format is version 2, which does not include
tcp-flags. Thetcp-flagsfield is required for connection count tracking.
- Filter: choose
-
Click Create flow log.
Step 3: Confirm log delivery
- After the flow log is created, wait a few minutes for delivery to start.
- In S3, confirm that new objects are being written under the prefix used by VPC Flow Logs.
Step 4: Grant Xshield access to the flow logs bucket
Xshield must be able to read the flow log objects in your bucket. Choose the method that matches how you onboarded your AWS account.
Interactive
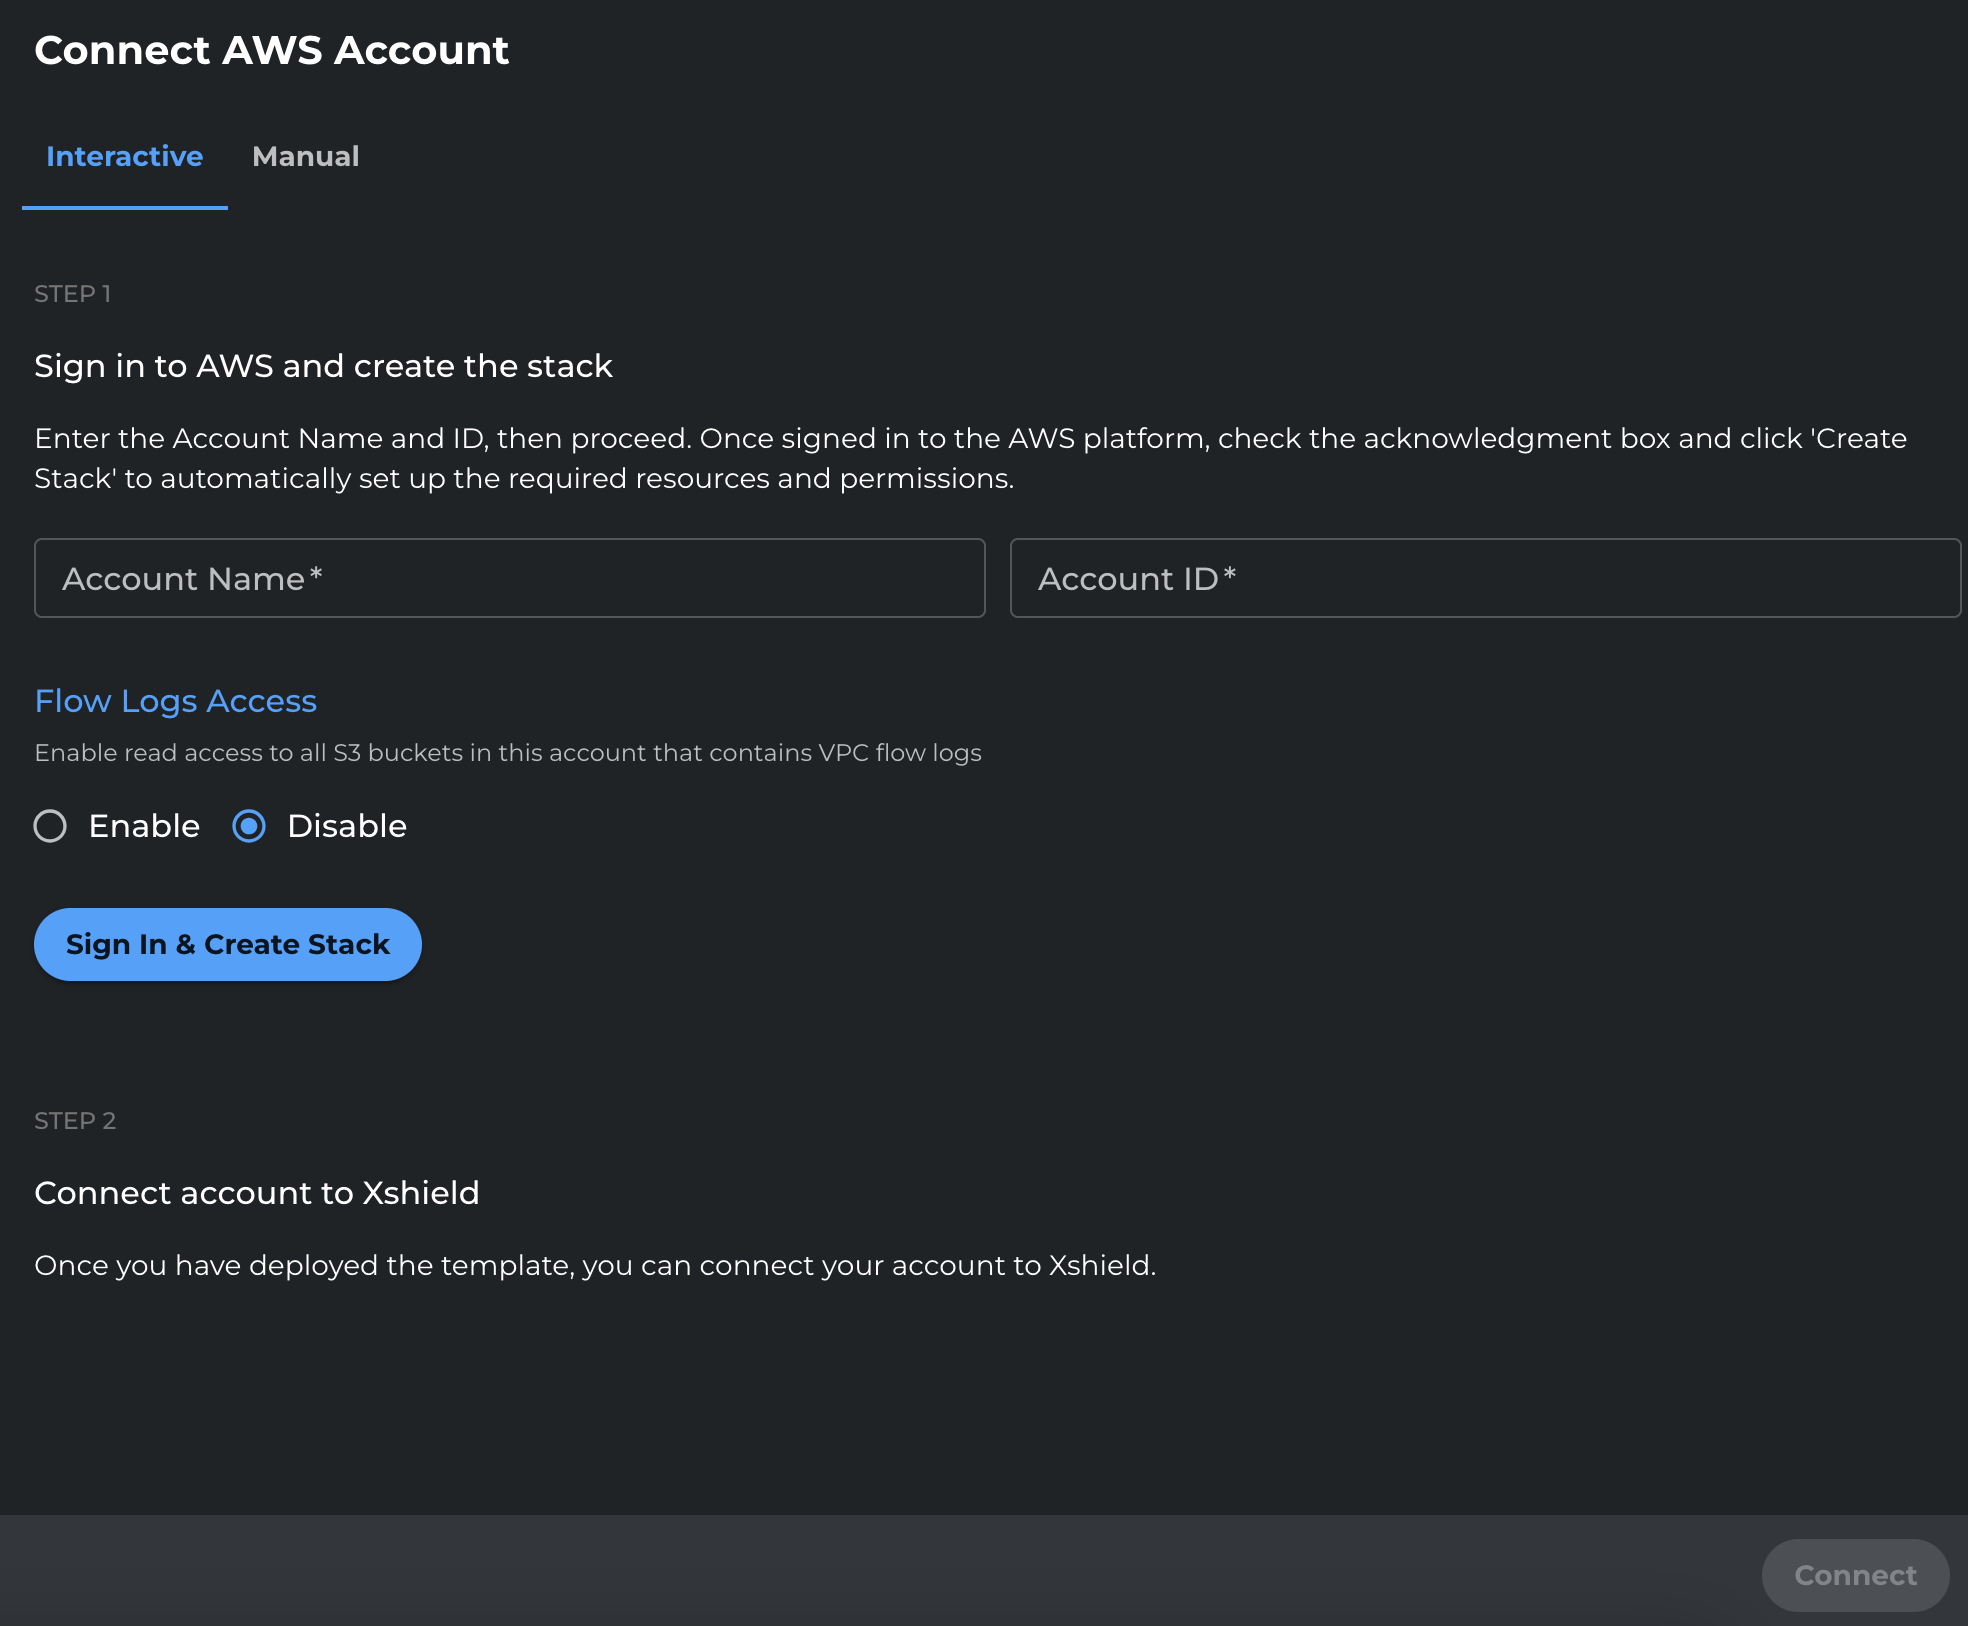
If you onboarded using the interactive flow, grant access via the Xshield portal. When you onboarded the account, flow logs storage access should have been disabled initially:
-
In the Xshield portal, go to Sensors → Cloud Connectors.
-
Select the AWS account you want to grant storage access to.
-
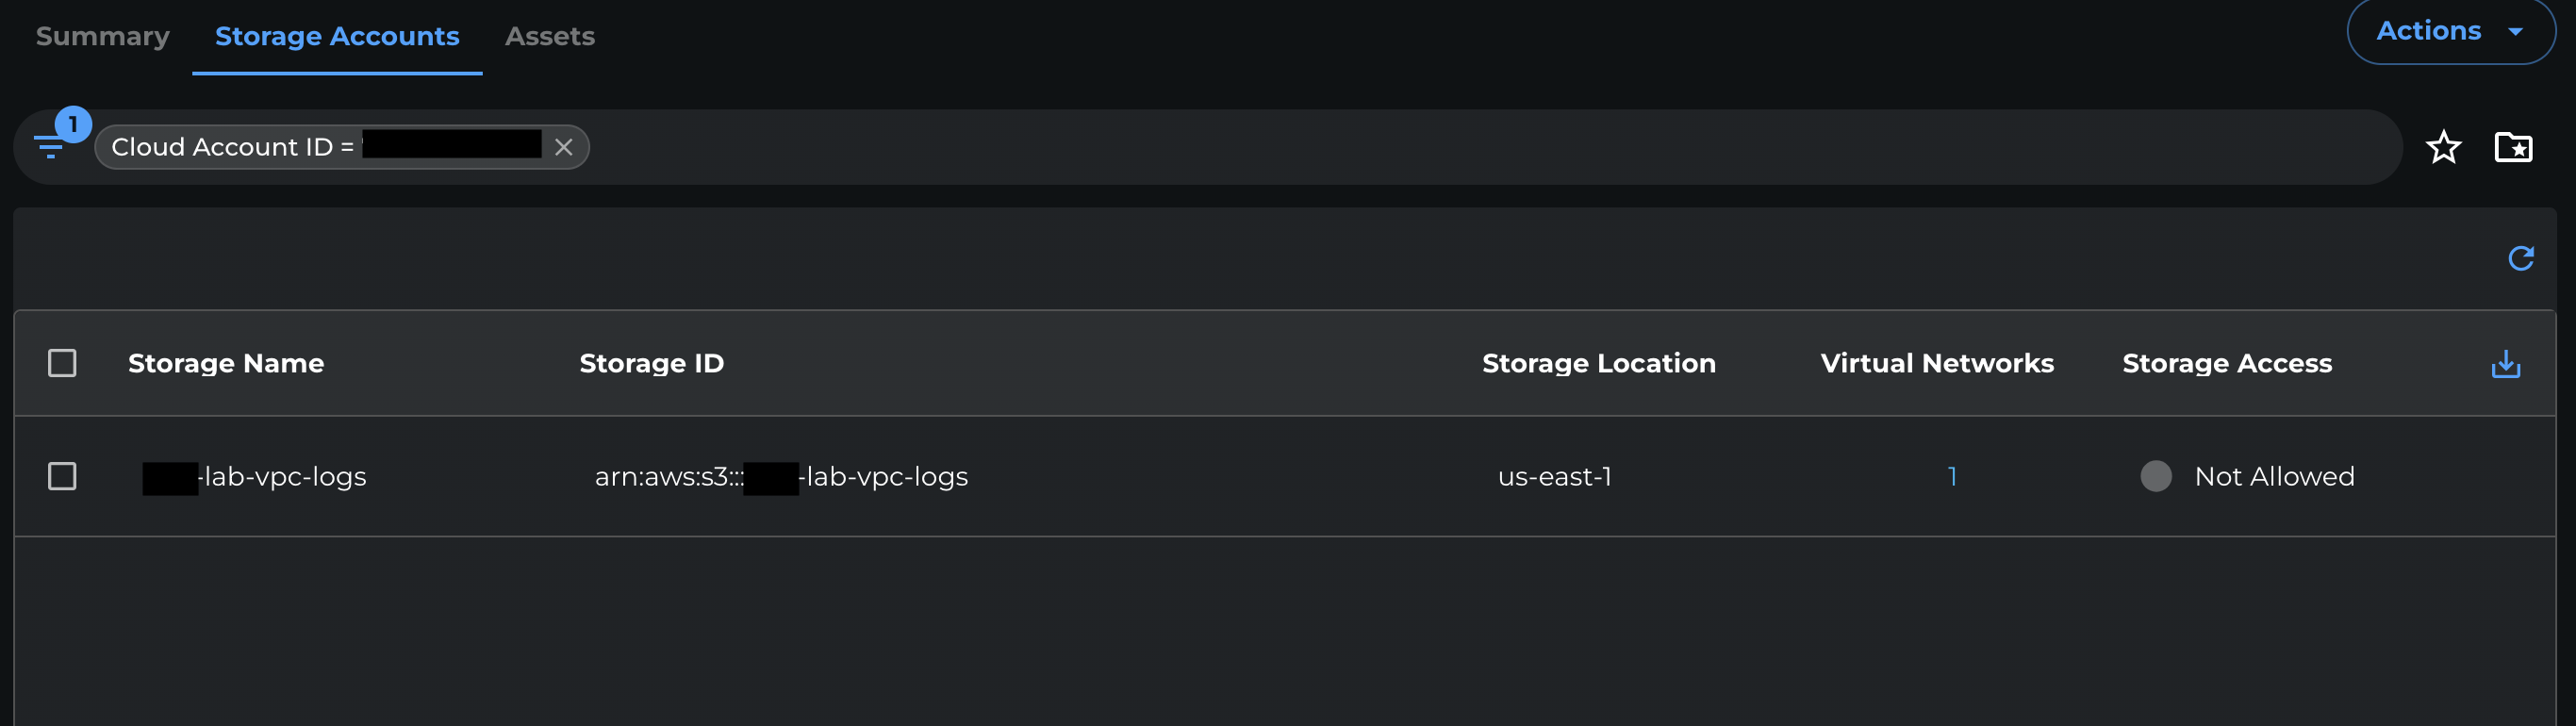
Open the Storage Accounts tab.
-
Select the S3 bucket you want to grant access to.
-
From the Storage access dropdown, select Grant.

-
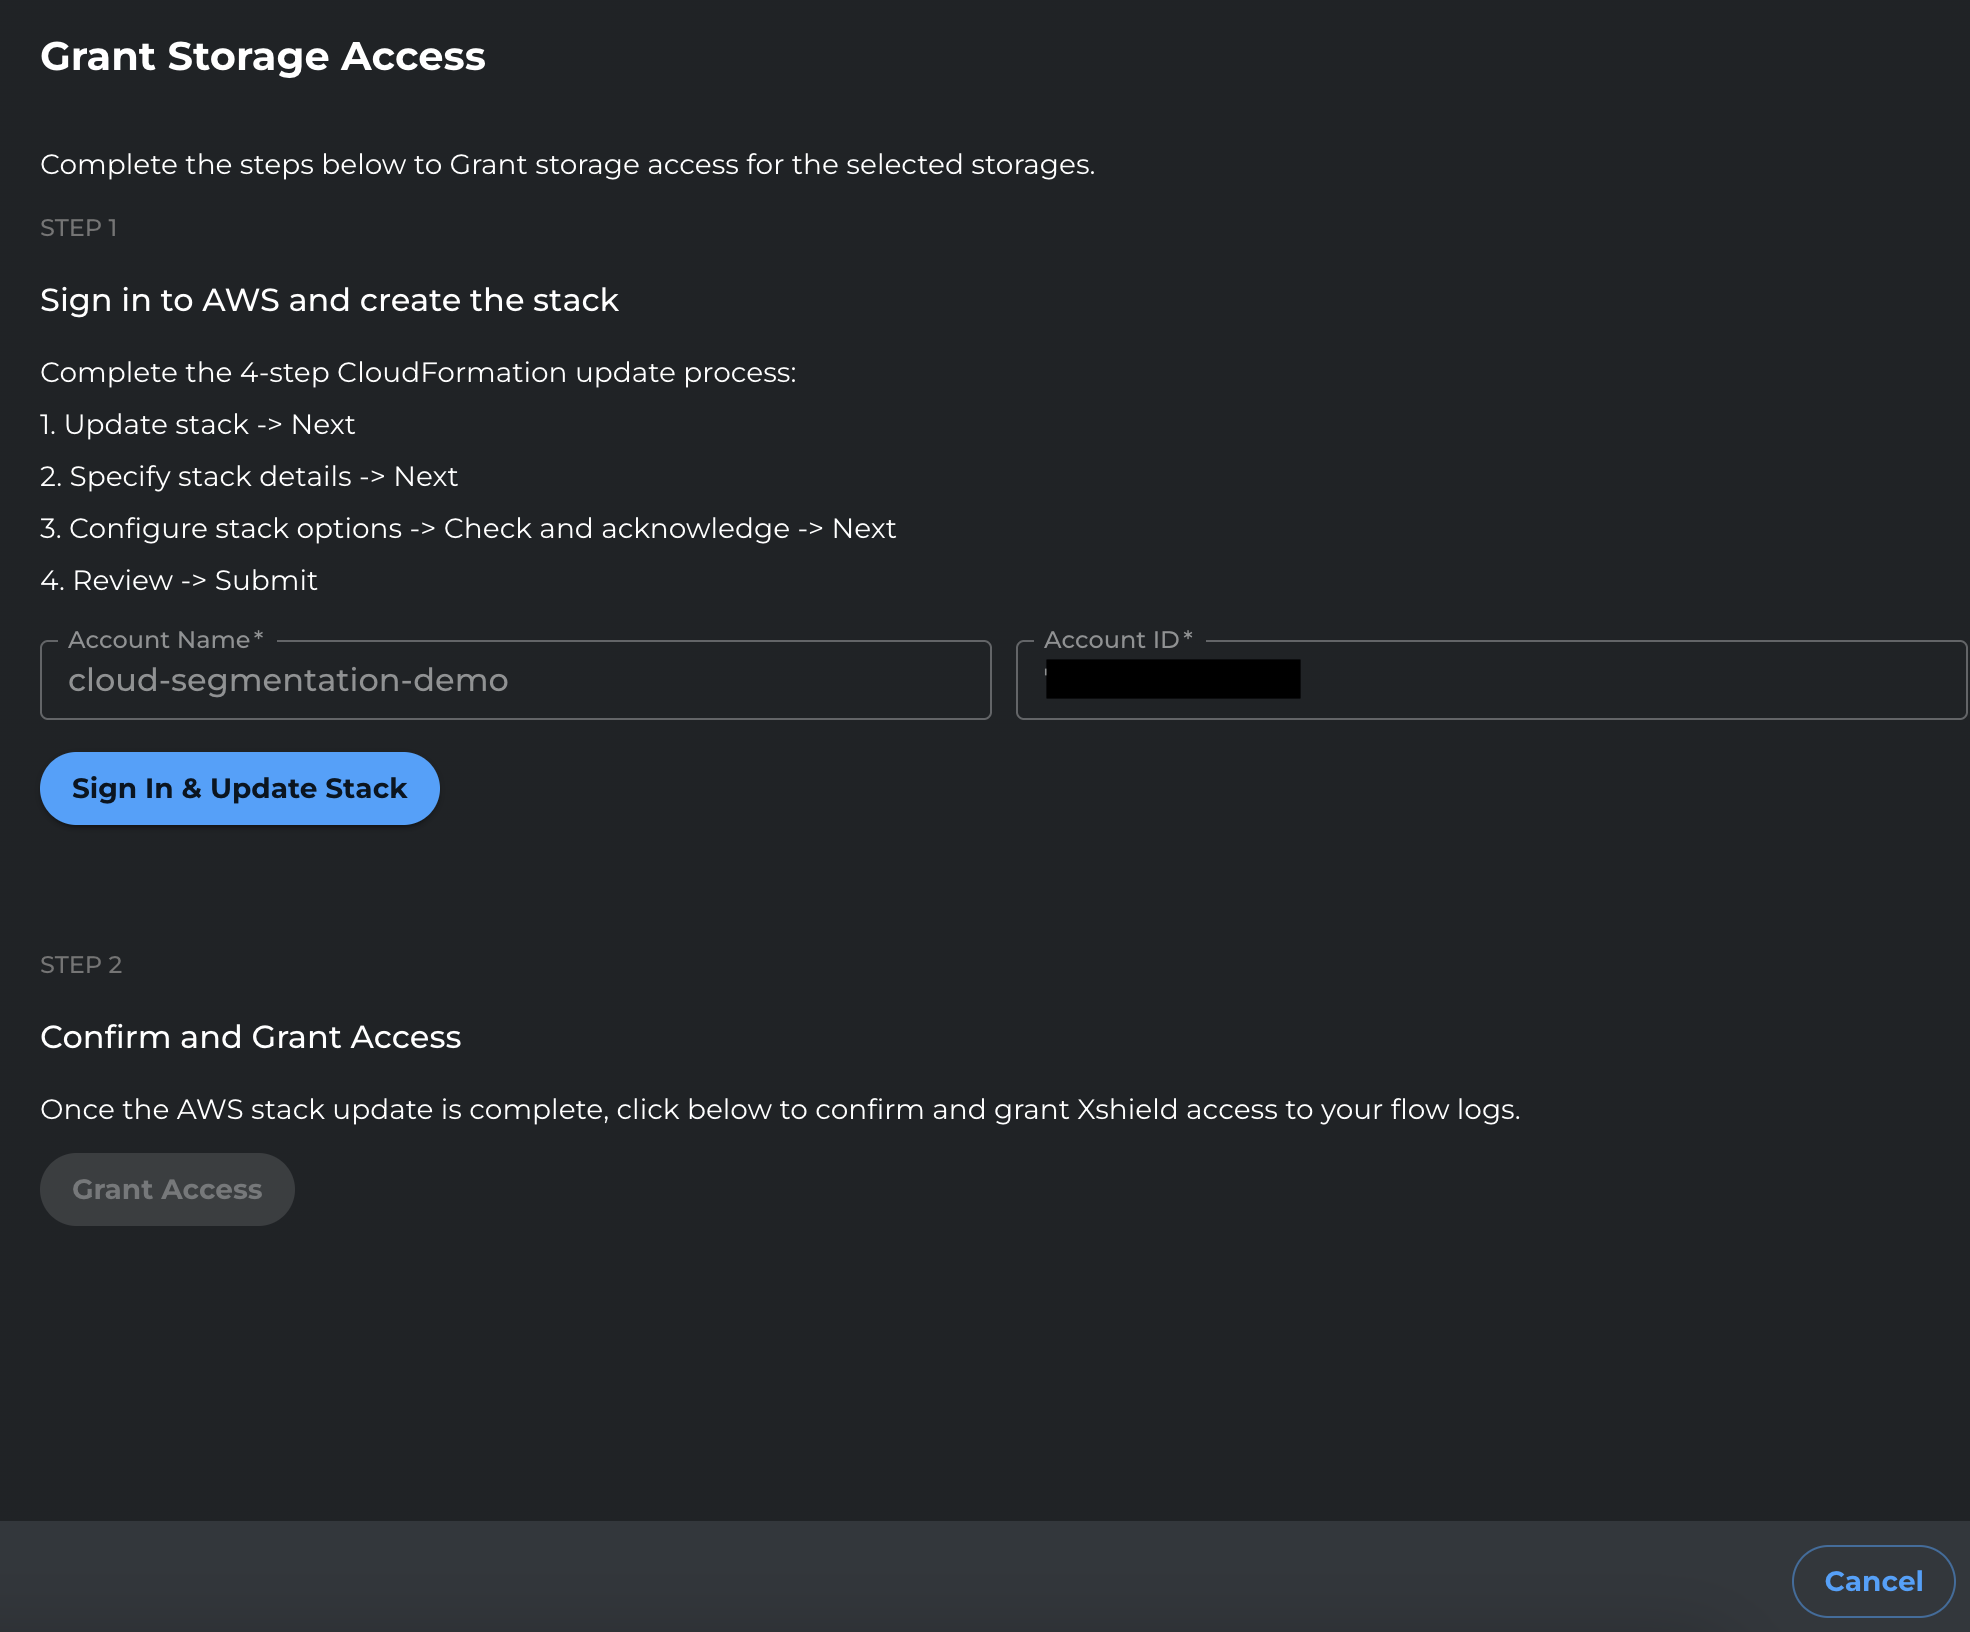
Click Sign in and update stack.
-
You will be redirected to AWS. Sign in with credentials that can update the CloudFormation stack.
-
In CloudFormation, click Next through the stack update pages.
-
On the final review page, review the changes, select the I acknowledge checkbox, and click Submit.
-
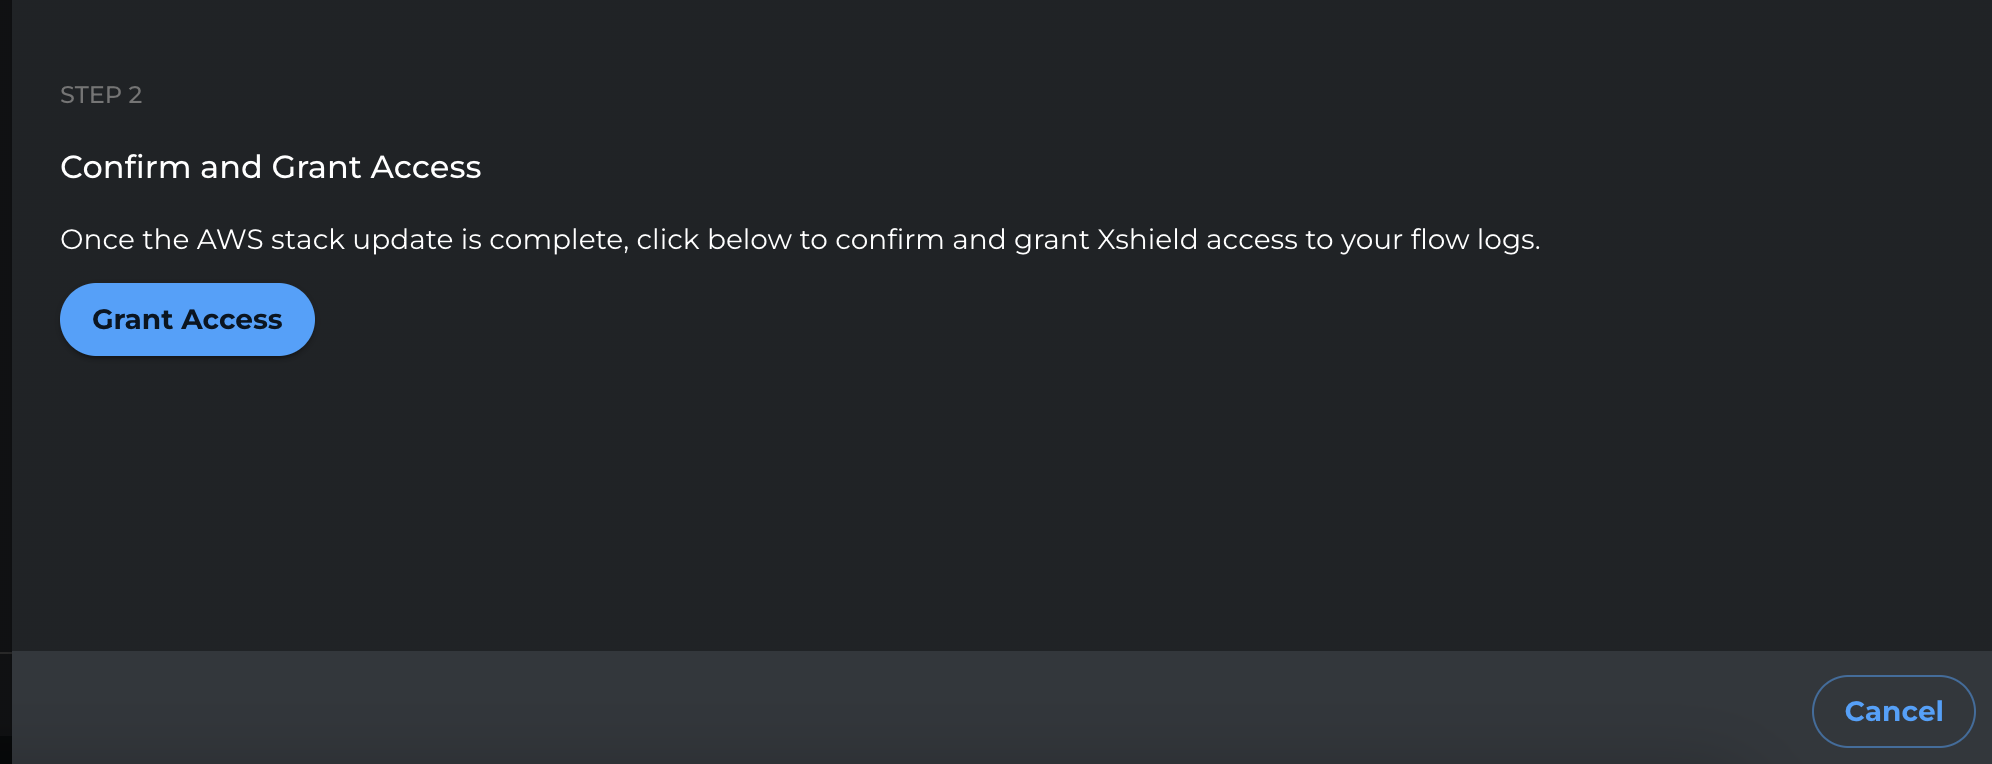
After the stack update completes, return to the Xshield portal and click Grant Access to finalize the change.
Script-based
If you onboarded using the deployment script, run the script again with the --storage-access flag:
-
In the Xshield portal, open the AWS onboarding flow and download the latest deployment script (the same script used during onboarding).
-
In your terminal, ensure your AWS CLI is authenticated to the target AWS account.
aws sts get-caller-identity --profile <AWS_PROFILE> -
Run the deployment script with the
--storage-accessflag to update the CloudFormation stack and enable S3 read access for flow log analysis.Optional flags (depending on your onboarding settings and use case):
--read-write
--no-deploy-xcloud
If your downloaded script supports it, you can target specific storage accounts with
--storage-idsand a comma-separated list of IDs:--storage-ids <ID_1,ID_2,ID_3>Example:
./deploy-colortokens-aws-stack.sh \
  --aws-profile <AWS_PROFILE> \
  --target-account <TARGET_AWS_ACCOUNT_ID> \
  --colortokens-account <COLORTOKENS_AWS_ACCOUNT_ID> \
  --xcloud-account <XCLOUD_AWS_ACCOUNT_ID> \
  --region <AWS_REGION> \
  --storage-access
Example with targeted storage IDs:
./deploy-colortokens-aws-stack.sh \
  --aws-profile <AWS_PROFILE> \
  --target-account <TARGET_AWS_ACCOUNT_ID> \
  --colortokens-account <COLORTOKENS_AWS_ACCOUNT_ID> \
  --xcloud-account <XCLOUD_AWS_ACCOUNT_ID> \
  --region <AWS_REGION> \
  --storage-access \
--storage-ids <ID_1,ID_2> -
Wait for the stack update to complete.
-
In the Xshield portal, re-run Verify / Connect (if available) and confirm storage-related functionality is enabled.
Manual (console-based)
If you created the cross-account role manually in the AWS Console (or via the manual onboarding flow), update the role's IAM policy:
-
Open the AWS Console and go to IAM → Roles.
-
Open the cross-account role you created for Xshield (for example,
ColorTokensCrossAccountAccessRole). -
Go to the Permissions tab.
-
Edit the inline policy that contains the S3 permissions (in the manual onboarding guide, the statement that includes
s3:ListBucket).- If you used an inline policy: click the policy name → Edit.
- If you used a managed policy: open the policy → Edit policy.
-
In the S3 statement, replace the wildcard resource (
"Resource": "*") with the ARN of your flow logs bucket and the ARN of objects in that bucket.-
Bucket ARN format:
arn:aws:s3:::YOUR_BUCKET_NAME -
Object ARN format:
arn:aws:s3:::YOUR_BUCKET_NAME/*
-
-
Add an S3 statement that allows reading objects in the bucket. Example (replace
YOUR_BUCKET_NAMEwith your flow logs bucket name):{
"Sid": "ColorTokensS3SpecificReadAccess",
"Effect": "Allow",
"Action": [
"s3:GetObject"
],
"Resource": [
"arn:aws:s3:::YOUR_BUCKET_NAME",
"arn:aws:s3:::YOUR_BUCKET_NAME/*"
]
} -
If you use more than one bucket for flow logs, add additional bucket and object ARNs to the
Resourcearray (one pair per bucket). -
Save the policy.
After this step, Xshield can read the flow log objects and network traffic visibility is available.
Step 5: Revoke access (optional)
Use these steps if you want to remove Xshield access to the flow logs bucket (for example, when you stop sending flow logs to that bucket). Choose the method that matches your onboarding path.
Interactive
-
In the Xshield portal, go to Sensors → Cloud Connectors.
-
Select the AWS account you want to revoke storage access from.
-
Open the Storage Accounts tab.
-
Select the S3 bucket you want to revoke access from.
-
From the Storage access dropdown, select Revoke.

-
Click Sign in and update stack.
-
You will be redirected to AWS. Sign in with credentials that can update the CloudFormation stack.
-
In CloudFormation, click Next through the stack update pages.
-
On the final review page, review the changes, select the I acknowledge checkbox, and click Submit.
-
After the stack update completes, return to the Xshield portal and click Revoke Access to finalize the change.

Script-based
-
In the Xshield portal, download the latest deployment script again. (This ensures you are using the current template and parameters.)
-
Run the deployment script without the
--storage-accessflag to update the CloudFormation stack and remove storage access permissions../deploy-colortokens-aws-stack.sh \
--aws-profile <AWS_PROFILE> \
--target-account <TARGET_AWS_ACCOUNT_ID> \
--colortokens-account <COLORTOKENS_AWS_ACCOUNT_ID> \
--xcloud-account <XCLOUD_AWS_ACCOUNT_ID> \
--region <AWS_REGION> -
Wait for the stack update to complete.
-
Validate the change:
- In AWS, optionally use IAM Policy Simulator to confirm S3 read actions are denied (as expected).
- In the Xshield portal, re-run Verify / Connect (if available).
Manual (console-based)
-
Open the AWS Console and go to IAM → Roles.
-
Open the Xshield cross-account role (for example,
ColorTokensCrossAccountAccessRole). -
Go to the Permissions tab and open the policy that contains the S3 permissions.
-
Remove the bucket ARN(s) from the S3 statement's
Resourcelist.- To revoke access for a single bucket, remove both:
arn:aws:s3:::YOUR_BUCKET_NAMEarn:aws:s3:::YOUR_BUCKET_NAME/*
- To revoke all S3 read access for this role, remove the entire S3 statement that includes
s3:GetObject, or remove all bucket/object ARNs from itsResourcelist.
- To revoke access for a single bucket, remove both:
-
Save the policy.
To revoke access for only a specific bucket (instead of disabling storage access entirely), use the Interactive or Manual (console-based) steps above.
Notes
- Unencrypted bucket required: The flow logs bucket (and objects) must be unencrypted for Xshield to read the data. Do not use SSE-KMS or customer-managed keys on this bucket.
- The VPC Flow Logs service must be able to write to the bucket. If your bucket policy is restrictive, ensure your configuration allows VPC Flow Logs delivery.
- Step 4 grants the cross-account role
s3:GetObjectand the necessary bucket ARNs so Xshield can read flow log objects. Without it, traffic analysis is not available for the data in that bucket.